
Week 7: WordPress Child Themes
HOMEWORK | Week 6 | Review
- Update your Google Calendar, adding deliverables deadlines for resume, portfolio, contact, skills, artist statement, images and home page and share this with your client. This should be your last push to receive content from your “client”.
-
- Your “client” should sign off on your site map by the end of the day on WEDNESDAY. Put your REVISED site map up on your blog.
- All prep for images including color corrections and/or contrast corrections AND image resizing should be completed by SUNDAY.
- Give them a drop dead deadline and do not accept any content after SATURDAY. Sort your content by page and put the text/images/video in the correlating folders on your DropBox. Take a screenshot of your DropBox folder and upload it to your blog.
- Make a list of missing or needed items by THURSDAY and relay the information to your client. Take a screenshot of your missing items listed and upload it to your blog.
- All wireframes should be completed and uploaded to your blog.
- Your theme should be installed along with the suggested plugins. You may add any additional plugins that you deem necessary.
- Add widgets to your sidebars.
- All menus, including sub nav and sidebars should be completed.
- Your “client” CONTACT and RESUME pages should be completed.
- On week 7 give me the URL to your blog, your client’s URL where the WordPress site is located and your Delicious account..
- On your del.icio.us account tag three Web Sites that focus on WordPress, WordPress widgets, WordPress plugins or anything we learned in class today, and write a note in the Delicious comments section about why you think each one would be a good resource for this class. ALSO, add week 6, etc. in your comments section so that I can keep track of your comments. *Make sure you also add the tag: msuinteractivemedia AS WELL AS add additional tags.
The Importance of Code
Theme Editing Basics
A WordPress “theme” is a collection of documents, generally consisting of:
- One or more CSS style sheets
- Any necessary images that comprise the theme graphics
- A collection of PHP/HTML “template” files
- A thumbnail image representing the theme in the Dashboard
A typical WordPress theme contains a dozen or more files, but only a few are technically required.
These files work together as a package to define the entire look and feel of a WordPress site. Themes are completely decoupled from site content, so in theory, a site owner can apply a new theme with the click of a button and have all content on their site take on a whole new appearance.
This collection of files is contained in a folder that lives in the wp-content/themes directory on your web server. When an administrator visits the Appearance | Themes section of the WordPress Dashboard, all valid theme folders in that location will appear. Any valid theme can be applied to the site content by clicking the Activate link below its name.
Editing Template Files
Before you learn how to determine which files to edit, you’ll need access to them. To edit a theme’s files, you’ve got two choices:
- Use the Dashboard’s built-in editor (Appearance | Editor)
- Edit template files in Text Wrangler and upload them via FTP
Using the Built-In Editor
The Dashboard is the easiest, but less powerful. In the Dashboard your editing in a standard web form and you don’t have the advantage of a text editor that offers syntax highlighting, line numbering, tag completion, or any of the dozens of other crucial features found in modern programmer’s editors.
Once in the theme editor, select one of the template files on the right, then look for an “Update” button below the text area.
Editing via FTP
When using FTP you can either drag files to the desktop for editing in Text Editor and then re-upload them, or configure your FTP client to edit files directly on the server. With this technique, the act of saving the document updates the file directly on the remote server. Note: Be careful because you will be overwriting the existing document and if you do not have a backup of the document, you will not be able to restore it.
Configuring preferences in the Transmit FTP client to launch double-clicked files in the TextMate editor. The Cyberduck client has a similar preference pane, as do many other S/FTP clients.
From here on, we’ll assume you’re editing files directly on the server via S/FTP configured to work with a good plain text editor (not a word processor).
FTP Tutorial
FTP Made Simple from kdmcinfo on Vimeo.
FTP stands for File Transfer Protocol. It is a means of transferring files directly between computers on the internet — usually between desktops and servers. You use FTP to upload the files that comprise a web site to a public web server (from a desktop to a public server). It’s also used to transfer files, usually large files, from a local users to a remote user. too large for email.
Definitions:
An FTP client is a desktop application you run on your own computer that lets you drag and drop files from your computer to a remote server.
Secure FTP does the same thing without transmitting passwords in clear text. SFTP is highly recommended over FTP. In fact, many universities and companies completely bans the use of non-secure FTP.
What You’ll Need:
You’ll need an FTP client to communicate with an FTP server. Below are just a few of the dozens of FTP clients available for Mac OS, Windows, and Unix/Linux. Some are free, some are shareware, and some have to be purchased.
Fetch Commercial, but free .edu version is available
*Note: You will need to download and install an FTP client on your computer.
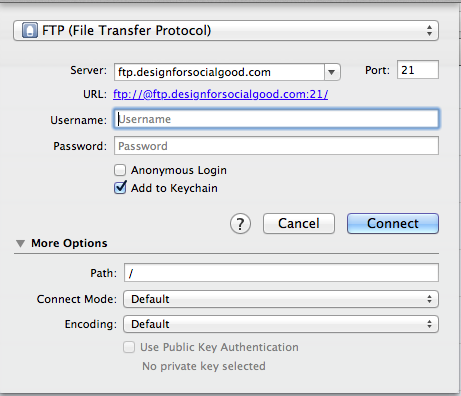
You’ll also need to know your FTP connection details in order to make a connection, including:
- Server name (hostname)
- Username
- Password
Your web host or system administrator can provide you with this information. Normally the hostname is the same as your domain name (domain.com) or a subdomain of that (ftp.yourdomain.com). Your username and password are most likely the same ones you used to sign up for the hosting account. Contact your host for all needing login information.
Making the Connection
Different FTP clients have different interfaces but the concept is the same. You’ll need to enter three things:
- The name of the server (aka the “hostname”) to which you’re connecting.
- Your username.
- Your password.
To remember your login information, create a “bookmark” inside the program.
Important: If you’re at a public DO NOT allow the bookmarking feature to store your password.
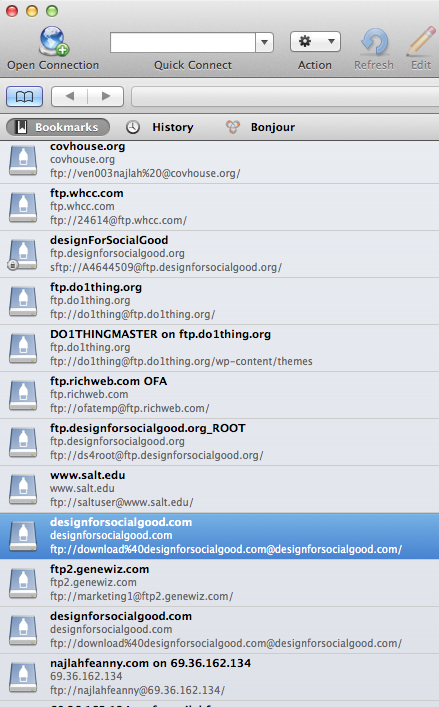
Cyberduck
The screenshot below show the bookmark screen in Cyberduck,. Click the Bookmark icon near the top left:
To add a new bookmark, click the “+” symbol at the lower left of the screen:
![]()
In the Nickname field, give the connection a name.
Select SFTP or FTP from the Protocol list, depending on who your connecting too and what the connection protocol is.
To open a connection, just double click on whichever one you want to connect to. You’ll be prompted for your password, which you can optionally have the computer remember for future use.
public_html. Everything that lives inside public_html will be visible on the public web. A web browser cannot access files and folders outside of this folder.Double-click the public_html folder to see its contents.
To upload content, simply drag and drop files from your local computer to the server. To download content, drag it from the server and drop it onto your desktop.
The Editing Process
Before you do ANYTHING ELSE, make sure you’ve got a complete and accurate copy of your web site on your desktop or flash drive in case your web host has a disk failure, or you inadvertently delete a file. It’s best to always to edit your site on your own computer, then upload files to the live server when needed.
After making an edit, you’ll need to re-upload each changed file. The file is not live on the web until you upload it. Your FTP client will prompt you to make sure you really intend to overwrite the copy of the file on the server. After overwriting the file, you’ll of course need to refresh your browser again to see the changes.
Basic Stylistic Changes
Most changes which effect the look and feel of a WordPress site can be handled through CSS alone, without ever touching the templates.
There’s no limit to how many stylistic changes you can make to a theme, but be aware that you may hit a point of diminishing returns and wish you’d started with a theme that was already closer to your end goal. Time put into initial theme selection is generally better spent than time spent on endless tweaks and modifications.
A WordPress style sheet is compromised of standard CSS code. None of it is specific to WordPress. The hardest part is usually in determining which portionof the CSS needs to be altered. A good debugger will help you to examine the page contents and see which lines of CSS code are controlling their appearance.
Enabling debug mode in Chrome: Just pull down View | Develop | Web Inspector (or hit Cmd-Opt-I) to bring it up.
For example; I want to change the background image of the theme. Bring up your debugger and click Elements. Next, click the magnifying glass icon at the bottom left.

To inspect elements on a page in the WebKit Inspector, click Elements, then use the Magnifying Glass to hone in on the element you’re interested in.
Now click on the page background and look at the CSS code in the right-hand pane:

This tells us exactly what we need to know: The path to the background image file can be found on line 75 of the file style.css. If you open style.css in your text editor, you’ll see that the entire line is:
|
1
|
background: url(images/bg-gradient.png) left bottom repeat-x fixed; |
So to change the background, upload a new background image to wp-content/themes/[yourtheme]/images, and edit line 75 to match the new filename.
For example: How can I change the banner image that came with my theme? Open the debuggerthe same way we did with the background image example. You’ll see the header image referenced, but not in a stylesheet. The way the header image is displayed will vary from theme to theme. Many thenes provide a set of Dashboard controls for setting the banner image. Taking a look in header.php for the Graphene theme, you’ll see this:
|
1
|
<div id="header" style="background-image:url(<?php echo $header_img; ?>);"> |
In other words, the HTML in the header template defines an inline style to the image path. But rather than hard-coding the image path, it calls a custom function defined by the theme. That function knows how to reach into the WordPress database and figure out which image you’ve told it to use from the Dashboard. In other words, no code changes needed for this tweak – you can do it all with point and click. But now you know how the header image is getting there to begin with.
For example: How do I change the fonts used on my site? Launch the debugger, grab the magnifying glass, and click on some text. The debugger will tell you on which line of the style sheet the font is declared. Then all you have to do is tell it which new font to use. You might even want to experiment with custom typography from a service like Google Fonts or TypeKit.
Common Theme Functions
Since template files are PHP documents, each template is capable of requesting information from the server. For example, the header.php template will generally request the blog title and tagline from the database and insert those values at the right place. Meanwhile, the sidebar template will look to see which Widgets need to be displayed, and the single.php template will grab the article body, byline, timestamp, and any comments from the database.
All of these calls for information from the database are handled by custom PHP “functions” specific to WordPress. For example, take a look in the header.php template and you might find a line something like this:
|
1
|
<p><a href="<?php echo home_url(); ?>"><img ...></a></p> |
In other words, the destination of the link is being replaced by the results of a call to a PHP function called home_url(). That function isn’t built into PHP itself – it’s a function provided by WordPress. Its value is whatever is set as the homepage URL in the Dashboard’s General Setting section. The cool thing about setting a link back to the homepage this way is that it makes the theme portable. If one WordPress installation is in the root domain of example.com but another site has a blog atexample.org/blog, both sites can use the same theme, and the homepage links will resolve perfectly. By avoiding hard-coding as much as possible, the theme stays adaptable to many situations and applications.
But how did the theme author learn of the home_url() function? By consulting the dictionary of WordPress Template Tags and the WordPress Function Reference, where dozens of such tags are documented. Let’s take a look at a few common ones:
get_bloginfo(): You’ll see this one referenced in header templates a lot. By giving it “arguments,” you can obtain most of the settings from the Dashboard’s General Setttings page. For example, try putting this in one of your templates:
|
1
|
<p><?php bloginfo('name'); ?></p> |
The title of the site will be inserted in the template wherever you drop this tag. So what if you want to refer to an image that lives in an “images” subdirectory of the theme directory? You can do it like this:
|
1
|
<img src="<?php bloginfo('template_url'); ?>/images/kdmc-topic-central.jpg" /> |
Now the image will still work even if you later decide to rename your theme folder!
In addition to the dozens of template tags that come with WordPress, many plugins will provide you with additional ones as well. Themes can also define their own custom functions in functions.php. If you see a function called from your theme that you can’t find listed in the Codex, then you’ll know it’s either provided by a required plugin or from that theme’s own custom functions.
Child Themes
Just like plugins, themes need to be upgraded from time to time.But what happens to all your css modifictaions when you upgrade it with a newer version, won’t you lose all your changes?
WordPress introduced a concept called “Child Themes,” to address just this. Child themes lets you make your changes where they won’t be touched by future “theme” upgrades.
One-Click Child Theme
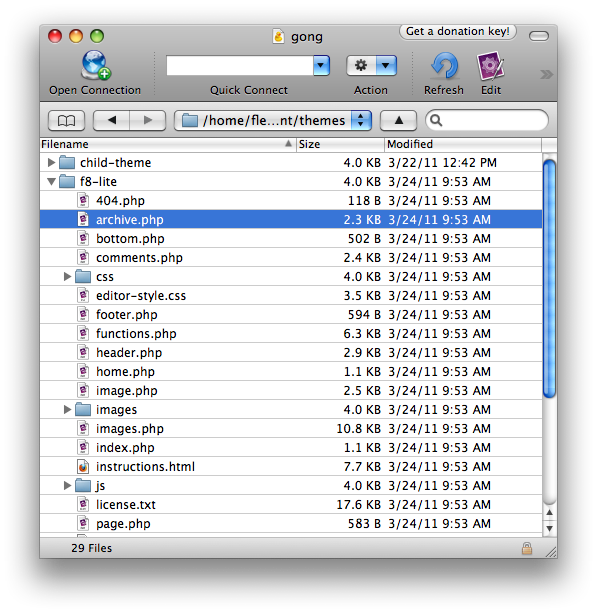
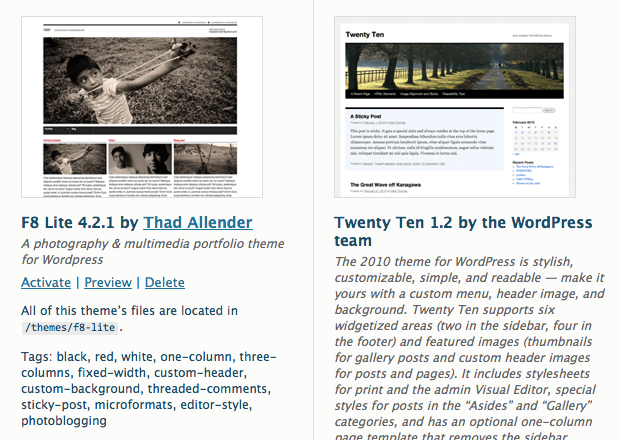
Take a look at the ARI WordPress theme I just uploaded. There’s TWO WAYS to create a child theme. One-Click Child Theme and Create a Child Theme Step by Step.
The quickest and easiest way to get started with a child theme is to use the One-Click Child Theme plugin. Just install it, activate the parent theme you want your child theme to be based on (if it isn’t active already), and click on “Child Theme” under Appearance in the WP dashboard.
From there, enter a name for your new child theme, a short description, and your name, and click on “Create Child”. One word or warning: I got an error message after clicking “Create Child”, but the child theme was created without a problem.
OR
Create a Create a Child Theme Step by Step
1) Log into your ftp, double click on your public_folder, find the site your working on and double click on it to open it.
- Open the folder: wp-content
- Open the folder: themes
- Open the folder: ari
Create a new, empty folder using standard web conventions (no spaces or special characters in the name). The folder could be named something like “ari_childtheme“. Your child theme will live in this folder.
2) Open up Text Wrangler and create a blank style.css file.
3) Open that style.css and add the following lines:
|
1
2
3
4
5
6
7
8
9
10
11
12
13
14
15
16
|
/*Theme Name: Ari Child Theme ExampleTheme URI: http: //desigonforsocialgood.org/testDescription: Child of the ari theme Author: Najlah HicksAuthor URI: http: //example.com/about/Template: AriVersion: 0.1.0*/@import url("../ari/style.css");/* Override styles from the parent theme's stylesheet below this comment. */ |
You’ll want to change most of the lines above to suit your needs. It’s not critical what they say, as long as the Theme Name doesn’t conflict with any theme you already have installed. The really important line is the Template: line – this must match the exact name of the folder that contains the parent theme! Likewise, edit the @import url line to match the path to the parent theme’s stylesheet.
Save this bare-bones stylesheet file to the server, then go to the Dashboard’s “Appearance” section and activate your new theme. Take a look at the live site and… nothing’s changed! That’s a good thing – at this point, all you’ve done is to activate a new theme that imports the entirety of the parent theme, with no changes.
Setting Theme Options
Before you start customizing your new child theme’s CSS, make sure you check out the theme options and do some customizations there. It’s better to make changes within the existing framework of the theme if that’s an option, as it makes it easier to manage your theme’s code.
Basics of Editing your Theme
If you go to the WordPress theme editor, you’ll see a mostly-blank style sheet for your new child theme. The first line of your new CSS file (after the child theme info) is importing the stylesheet from the parent theme. This is vital, and it has to remain at the top of your sheet or the parent stylesheet will be invalidated and won’t import.
One thing you may want to do at this point is install a better code editor plugin for theme editing. Color-coded syntax makes it significantly easier to code directly in WP, and will especially be useful for those who are used to colored syntax with outside editors. My personal choice is Advanced Code Editor.
Adding CSS to Your Child Theme
The Basics
Let’s start by defining things like the body background color, the typography, and other basics that will give us the basis for our child theme. This code sets up everything in the header, with the exception of moving our navigation menu. Let’s break it down into a few different steps.
Inserting Code into your Head or Elsewhere in your Theme
This is probably the most technical part of creating a child theme, and is only necessary if you wannt to do something like add Google Web Fonts to your site. That’s exactly what we’re going to do here. This is the only time in creating your child theme that you’ll need to work with PHP, and if you don’t need to insert anything into your theme’s header or elsewhere, you won’t need to work with PHP at all.
First, create a functions.php file in your text or code editor of choice. The basic code you’ll use will look something like this:
<?php function customfunctionname() { ?>
 <script type="text/javascript"> Whatever your JavaScript is </script> <?php } add_action('wp_head', 'customfunctionname'); ?>
For the child theme above, we needed to insert code into our header to link the appropriate Google Web Fonts so we could call them into our CSS. Here’s how we do that (you can get the link directly from Google with whichever fonts you want to use):
<?php function googlefonts() { ?>
    <link href='http://fonts.googleapis.com/css?family=Dancing+Script:400,700' rel='stylesheet' type='text/css'>
<?php }
add_action('wp_head', 'googlefonts');
?>
Now your fonts should all be working properly! And all the functions that were included in the original parent theme will still be working, too.
Read about it in more detail here.
Conclusion on Child Themes
Creating a child theme is incredibly simple when compared to designing and coding a theme from scratch. With some basic CSS knowledge and just a little bit of PHP, you can create basically any kind of theme you want.
Make sure that your code is well-written, commented, and organized. This way, if your parent theme is updated, your child theme is unlikely to break.
The child theme we’ve created in this tutorial is very, very basic. But it gives you the information you need to start designing your own themes. Child themes, when built on a great parent theme, can be as powerful as any other theme available. For more information on child themes, check out the WordPress Codex.
HOMEWORK | Week 7
- Create a CHILD THEME for your theme and install it. Add child theme to the new name. Take a screen shot and upload it to your blog.
- Change at least FIVE attributes in the style.css on your child theme. Take screen shots before and after, showing the difference and upload to your blog.
- Finish loading ALL content to your client’s site.
- On week 8 give me the URL to your blog, your client’s URL where the WordPress site is located and your Delicious account.
- On your del.icio.us account tag three Web Sites that focus on WordPress and WordPress child themes or anything we learned in class today, and write a note in the Delicious comments section about why you think each one would be a good resource for this class. ALSO, add week 7, etc. in your comments section so that I can keep track of your comments. *Make sure you also add the tag: msuinteractivemedia AS WELL AS add additional tags.
- Be prepared to present your client’s site to the class for CRITIQUE on week 8. The FINAL and completed site will be due on week 9.

Recent Comments